Drawing a tow truck is more than just a creative exercise—it’s a great way to understand the intricate mechanics and design features of these essential vehicles. Whether you’re an auto repair shop looking to illustrate your services or a property manager needing to represent your fleet visually, mastering the art of tow truck drawing can add significant value to your operations. This guide will take you through each step, from sketching the basic structure to finalizing your artwork with refined details, ensuring that your drawings are not only accurate but also artistically appealing. In the chapters that follow, you’ll discover practical techniques and tips tailored to help you develop a professional representation while reinforcing the functionality that defines a tow truck in various roles.
Foundations in Steel: Drafting the Tow Truck’s Basic Outline and Structural Core
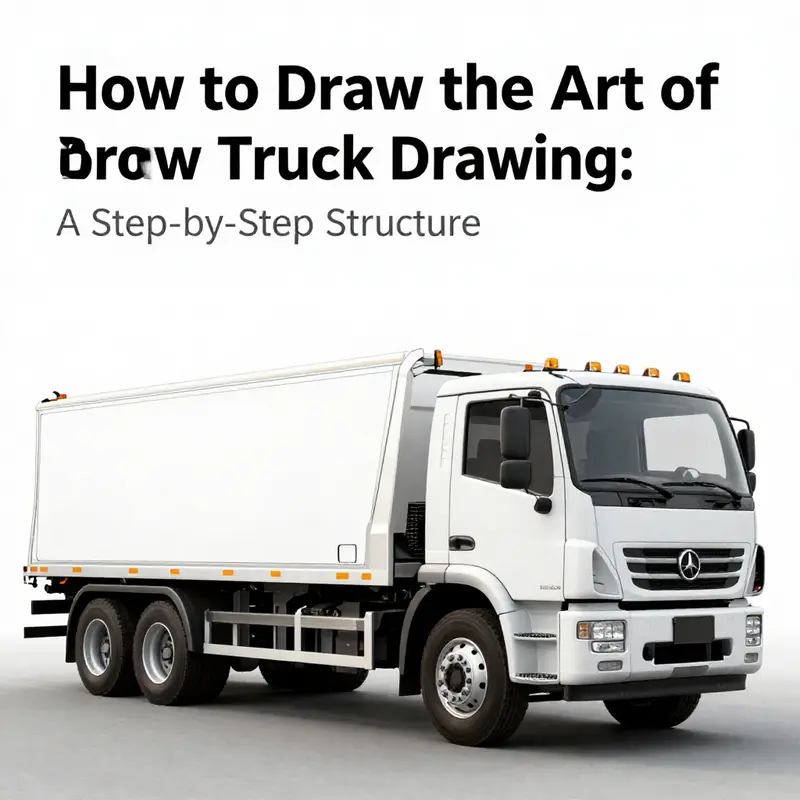
Sketching a tow truck begins long before the first line of the boom. It starts with an instinctive sense of proportion, a mental map of how the cab and the chassis relate to the heavy-duty machinery that sits behind them. In many ways, a tow truck is a study in balance: a tall, protective cab perched over a long, sturdy frame, with a hydraulic arm that reaches out with purpose and authority. The basic outline—two primary forms that work as a single, cohesive silhouette—gives a drawing a believable life. When you start, you don’t just draw the vehicle; you sketch the logic of its work. The cab must feel elevated enough to offer a driver a clear view of the road, yet compact enough to sit comfortably atop a long chassis designed to carry a heavy-duty partner in tow. The front windshield should slope, not merely because it looks right, but because it captures the forward lean of a vehicle built for quick, precise decisions under pressure. A longer, flatter lower body then extends from the cab to form the chassis, hinting at the strength beneath.
In this first act of construction, imagine the tow truck as a pair of intersecting lines that define mass and reach. The cab becomes a tall rectangle with a slightly peaked roof, its upper edge clean and decisive. The windshield is a trapezoid carved into the front, its sides converging as if the glass itself is catching the speed of a moving ride-along. Behind the cab, a longer rectangle will become the chassis, the backbone that anchors the lifting apparatus and the wheels. You’ll keep the proportions in mind: the cab is taller than it is wide, while the chassis stretches out with a deliberate, utilitarian length. The lines here aren’t decorative; they’re the map of how forces travel from the engine to the tires, through the frame, and into the tow mechanism that makes the truck’s purpose explicit. As you lay these shapes down, you’re not just outlining a vehicle—you’re sketching a system built for reliability and efficiency in demanding conditions.
The next essential move is to give this outline a sense of velocity and purpose without sacrificing the sturdy feel that a tow truck must convey. The boom, which will define the truck’s most distinctive feature, is the visible promise of its function. In many models, the boom emerges as a strong horizontal element that can be extended, raised, or rotated to reach a disabled vehicle. For a convincing drawing, you can place the boom at the rear or along the side of the chassis, depending on the angle you want to portray. Think of it as a hydraulic arm anchored into the frame, ready to carry a heavy load. Draw a robust line that runs from the body outward, then imagine a joint or two that would allow this limb to move with the precision of a crane. You don’t need every hydraulic cylinder in place to begin; you’re building a believable core that informs the rest of the design. The hook or cable system will live at the end of the bar, a tiny but telling detail that communicates the truck’s job at a glance. As you sketch, consider how the cable would retract; perhaps a small drum or pulley near the cab helps suggest the mechanism in operation. This is where your drawing starts to hum with practical energy, moving from a static outline to a working machine in your imagination.
Equally important is the wheel-lift system, a feature that distinguishes tow trucks from ordinary service vehicles. In routine terms, the wheel-lift uses a metal yoke or fork that slides under a wheel, steadying the vehicle so the tow truck can carry it away. In your drawing, you can imply this system with a few precise lines that connect the lift to the frame without detailing every mechanism. The emphasis should be on how the lift attaches to the chassis and how it would engage with the wheel of another car. Position the wheels with care—the truck needs four sturdy tires that look capable of handling heavy loads, and the spacing should reflect real-world stability. Large tires can dominate the lower portion of the drawing, anchoring the vehicle to the ground while the upper sections reveal the cab and the lifting apparatus.
A tow truck’s body is more than a single rectangle. It’s a composition of crossbars, brackets, and support beams that give the machine its rugged, industrial character. When refining your outline, lightly introduce crossbars that run laterally under the chassis; these aren’t mere details. They are structural cues that tell the viewer this vehicle is built to handle stress. Ladder-like rungs or small walkways along the sides can suggest access points for maintenance and operation, while a prominent grill or bumper at the cab’s front adds personality and function. Side mirrors should project outward enough to imply visibility in tight towing operations, and headlights must be placed with a practical geometry so the face of the truck reads clearly from a distance. Each of these elements, while simple on the page, contributes to the overall impression of durability and purpose.
With the general shape in place, you approach the drawing with a more refined hand. You begin to soften and sharpen lines to indicate different materials and strengths: the chrome or metal sheen on the bumper, the textured tread of the tires, and the matte body paneling of the cab. The shading becomes a language of its own, revealing not just form but the implied weight of the machinery. The underside of the chassis, the wheel wells, and the spaces between the axle and the frame all gain depth as you layer pencil lines, gradually turning a flat outline into a tangible machine. This stage is where you start to ask questions about light: where does it fall on the truck, where do deep shadows accumulate, and how does the cable gleam in a certain light? The answers you craft with shading will do more than make the drawing look real; they will embed it with the quiet authority of metal and hydraulic power.
As the drawing nears completion, you turn your attention to the little details that tell a broader story. A license plate on the cab, door handles, and the subtle branding on the sides can add identity without overpowering the scene. These touches anchor the tow truck in a believable world, where such markings aren’t just decoration but part of a working system with real operators and fleets. If you’re aiming for realism, consult reference images and pay attention to how these trucks are laid out in the real world. The details you choose to emphasize—be it the placement of the light bar on the roof, the shape of the mirrors, or the design of the rear bumper and hook area—will influence how viewers read the image: as a mere sketch or as a credible portrayal of a machine built to rescue and recover.
Practice, observation, and iteration are your allies. The more you study real tow trucks, the more natural your lines will become, and the more confidently you’ll translate their mass and function onto paper. Proportion, alignment, and line weight—these are the quiet mechanics behind a convincing sketch. A useful habit is to compare your drawing to a few different references, paying attention to how the cab sits relative to the boom and how the wheel-lift attaches to the frame. Proportions can shift subtly from one vehicle to another, and capturing these variations will give your tow truck drawing authenticity rather than a generic silhouette. For visual learners, a quick look at a step-by-step video can be immensely helpful, and you can find a well-structured tutorial such as the one from Draw Doodles for a guided demonstration of the process. As you work through the steps, remember that every line you place is a statement about function: this is a vehicle built to hoist, pull, and transport heavy loads with control and reliability.
If you want to deepen your understanding of the real-world context behind the drawings, a small but helpful resource is the internal description of the chassis and boom integration you’ll find in the basic-outline guides on the blog space of a tow-truck-focused site. For readers who want to explore more foundations and to see how others approach the same problem, see the entry on the The Island Tow Truck blog. This reference can reinforce your grasp of how the chassis, cab, and boom fit together in a practical, working design. The Island Tow Truck blog.
As you move from sketch to surface, the final pass—ink and shading—becomes the bridge between a plan and a tangible drawing. Inking should be deliberate, with clean, confident strokes that carry the weight of the tones you’ve sculpted in pencil. When you ink, you can also decide where to let some lines fade or soften to suggest depth and distance. The goal is to retain the crispness of the essential lines—the cab silhouette, the chassis backbone, the boom, the wheel-lift, the wheel wells—while allowing shadow and texture to do the rest. You may choose to add a subtle reflection on the cab’s surface or a gradient across the boom to imply curvature and length. The result is a composition that not only looks credible but also feels like a real, working machine with a purpose and a story behind it.
In the end, what makes a tow truck drawing compelling isn’t merely the accuracy of its parts but the sense of mechanism and motion it conveys. The basic outline provides the skeleton; the boom and wheel-lift give it a function; the details, lighting, and shading breathe life into it. When you stand back and view the finished piece, you should sense a vehicle ready to tackle a roadside challenge, a machine designed to reach, hoist, and transport with precision. You’ll notice that the figure reads as neither flat nor static, but as a crafted intersection of geometry, engineering, and art. If you’re revisiting the drawing later, you can refine proportions again, compare with various references, and adjust line weight to emphasize the truck’s mass or its lean, mechanical elegance. The work is iterative, and each pass teaches you something new about how to translate industrial design into an expressive illustration.
For further reading on how tow truck structures and their engineering are conceived in real life, you can explore a comprehensive overview that delves into the boom’s composition and the way these systems benefit industrial projects. External reference: Tow Truck Boom Overview. https://www.towtruckbooms.com/overview
Under the Hook: Mastering the Tow Truck’s Towing Mechanism
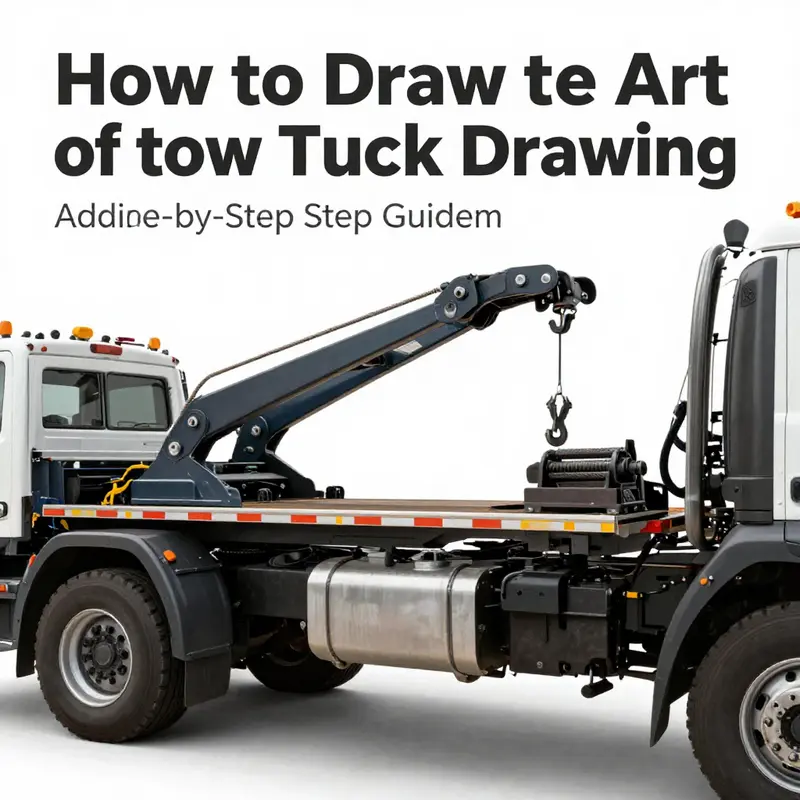
The towing mechanism is the signature feature that makes a tow truck instantly recognizable on the road, and it is also the most interesting challenge to render with a sense of weight, purpose, and engineering. When you draw this part, you’re not just sketching a tool; you’re giving the vehicle a function, a story, and a visible link between power and motion. Begin with a clear mental image of how the heart of the system—the winch—drives everything else. The winch sits at the core, a compact block of steel and hydraulics that twists and pulls a steel cable along a defined path. Behind the cab and along the frame, a robust array of brackets and supports anchors the winch and its drum, resisting the tension of a heavy load. The cable itself is more than a line; it’s a living curve in space, a guide for your pencil to follow as it traces the way a trapped car becomes mobile again. The hitch or coupling point completes the chain, the place where the rescued vehicle finally connects to the tow truck and rides to safety. Part of the visual appeal is the sense of scale and mechanical precision—thick, knurled cable wrapping around a drum, a hook that gleams with a slight notch where it would bite into a receiver, and a housing that looks as if it could bear a thousand pounds without a shiver.
To begin, situate the main components in a way that respects perspective. In a three-quarter view, the winch drum should appear as a circular form tucked under a sturdy rectangular housing. The housing itself sits just behind the cab, attached to the frame with thick brackets. The cable leaves the drum in a tight spiral and travels along a smooth but clearly defined track toward the front or side of the truck, depending on your chosen angle. If your composition allows the cable to extend toward the viewer, you’ll emphasize tension and power; if it runs away from the viewer, you’ll highlight the machine’s restraint and mechanical quiet. Either choice works, but the key is to maintain consistent curvature and a believable taper for the steel line so it never looks like a simple straight string. A few short, faint lines along the cable can imply a braided texture, while brighter highlights along its edge convey the gleam of metal catching light.
The winch drum should feel tangible, not just as a circular shape but as a piece with subtle depth. Draw the drum with a shallow cylinder visible inside the housing—an inner circle that hints at the hollow core where the cable coils. Around the drum, sketch a ring of small bolts or rivets that anchor the housing to the frame. These tiny details are how you convey the sense of endurance and reliability that tow trucks are built for. As you work, keep the scale consistent: the drum should be proportionate to the housing and the frame, and the cable’s thickness should be measured against the width of the drum’s coil. It’s easy to overdo the thickness of the line, which makes the mechanism look cartoonish; aim for a balance where the cable reads as strong yet fine enough to be drawn with a single line that still suggests depth when shaded.
Beyond the winch, the wheel-lift system is where the towing mechanism becomes dynamically visible. The wheel-lift is typically a metal yoke or fork that slides under one wheel of the disabled vehicle, connected to strong hydraulic or mechanical arms that lift the end of the car off the ground for transport. When you draw the wheel-lift, you’re not merely drawing a static apparatus; you’re depicting a set of levers, pivots, and joints that translate hydraulic force into a controlled lift. Start with the yoke: a simple, sturdy U-shaped or fork-like metal piece that can cradle a wheel. The forks should grip a wheel snugly but without appearing to crush it. Underneath, hint at the tracks where the forks slide along the truck’s frame, with small rails or guide blocks that keep the lift aligned as it moves. Then add the hydraulic or mechanical arms. These arms connect the yoke to the main frame, and they should read as robust cylinders or linkages with clear articulation points. You can show the arms in a slightly angled position to imply that the wheel is being lifted, which gives your drawing a moment of action rather than a static pose.
To integrate the wheel-lift seamlessly, imagine the wheel’s plane as a reference plane for the entire focal area. The yoke should sit beneath the wheel as if the wheel is the subject to be elevated, and the arms should arrive at the yoke from the frame with visible hinges or hydraulic joints. You’ll want to draw a sense of extension and reach—thin, strong lines for hydraulic hoses or mechanical linkages traveling from the frame to the lifting arms. Remember to balance the geometry: the more intricate the lift, the more you’ll need to simplify other parts of the drawing so the mechanism remains legible. If the wheel is closer to the viewer, give the yoke a slightly larger silhouette and exaggerate the shading to emphasize volume and mass. If the wheel is further away, preserve perspective by shortening the arms and reducing the line weight accordingly.
Detailing the connection points is essential for realism. The winch drum, the cable, and the lift arms tie into the frame through anchor points that look like sturdy brackets, thick bolts, and reinforced crossbars. Include a few crossbars running along the side of the frame behind the cab to suggest the structural backbone of the towing setup. Small, carefully placed details—the line where the cable exits the drum, the bit of cable looped around a pulley near the back of the cab, the ridge of a hook’s shank—these are the cues that tell the viewer this is not just any truck, but a machine designed to restore movement to stalled vehicles. If you want to push realism further, sketch a simple hook at the end of the cable or a detachable receiver that the wheel-lift can engage. The hook should have a slight curvature and a tiny notch at the tip, while the receiver should appear as a shallow, rectangular slot with rounded corners.
When you begin refining, think about the lines that define the metal texture. The winch housing and the lift arms benefit from a combination of hard edges and softened transitions where panels meet. To imply metal without over-emphasizing shine, vary your line weight: heavier lines for the frame’s outer edges and brackets, lighter lines for inner details and cables. The cable benefits from a slightly wavy, taut look—almost like it’s pulling on something just out of sight. The wheel’s rim should gleam in a small highlight, with the tire rendered in deep, even tones that suggest rubber’s matte surface. If you choose to add weathering or wear, tiny scratches and rivets along the edges can imply that this is a tool that has seen road time and service, not a pristine model. The goal is to communicate function through form: the winch and wheel-lift are not decorative; they are the mechanism that makes the tow truck capable of ferrying a broken car to safety.
As you finalize, erase extraneous construction lines and tighten the essential contours. You may want to add a light wash of shading under the chassis to ground the vehicle and give the mechanism a sense of weight. The area around the winch drum and the lift arms will likely catch the most light, so plan your highlights there. Use cross-hatching or smooth gradient shading to convey metal’s reflective properties, and reserve the darkest shadows for the underside of the frame and the wheel wells where the heavy components sit in shadow. If your composition allows, a hint of the vehicle being towed in the background—the top of a curb, a portion of another car—can provide context without distracting from the principal subject.
Incorporating the towing mechanism into your tow-truck drawing is not only about the mechanical accuracy but also about how the parts convey intention. The winch’s tension, the lift’s reach, and the cable’s path together tell a story of effort, durability, and the tireless service these machines provide. To deepen your understanding of how these systems are discussed in broader industry contexts and to connect your drawing practice to real-world operations, you can explore resources that address fleet readiness and emergency response strategies. essential fleet emergency response strategies.
If you want to see how the visual documentation of such equipment translates into real-world reference, study photographs from heavy-duty tow setups and road-service fleets. Look for images that show the coupling point, the lift arms in action, and the way the cable winds around the drum. Observing the geometry from multiple angles helps you translate a three-dimensional mechanism onto a two-dimensional page with confidence. The more you study, the more natural it will feel to place each component in proportion to the others, to shade them convincingly, and to narrate a moment of mechanical action without a single extraneous line.
As a final note, remember that even the most intricate details should serve readability. If a particular angle makes the wheel-lift appear cluttered, simplify the lines and focus on the most essential features: the yoke, the hydraulic arms, and the cable path. Your goal is to evoke a working mechanism that exudes strength and reliability, not to overwhelm the viewer with every bolt. With practice, your tow-truck drawings will not only capture the look of the towing mechanism but also the sense of purpose that makes these machines indispensable on the road. For linguistic and historical context on the term itself, a concise external reference is available at https://www.etymonline.com/word/tow-truck.
Tow Truck Drafting Deep: Rendering Wheels, Chassis, and the Weight of Realism

A tow truck is not merely a vehicle drawn on a page; it is a compact mass of purpose, engineered to bear heavy loads and operate in demanding environments. When you set out to sketch one, the most convincing starting point is the wheel and chassis, the structural core that anchors every other detail. The approach should feel almost sculptural: begin with a simple, sturdy foundation, then coax depth and function from the underlying forms. This chapter follows a steady path from foundational blocks to the precise cues that convey strength, leverage, and reliability. If you want to see how others translate these basics into practice, you can explore more on theislandtowtruck.com/blog, which offers practical examples and tips that mirror the thought process behind drawing a working tow truck.
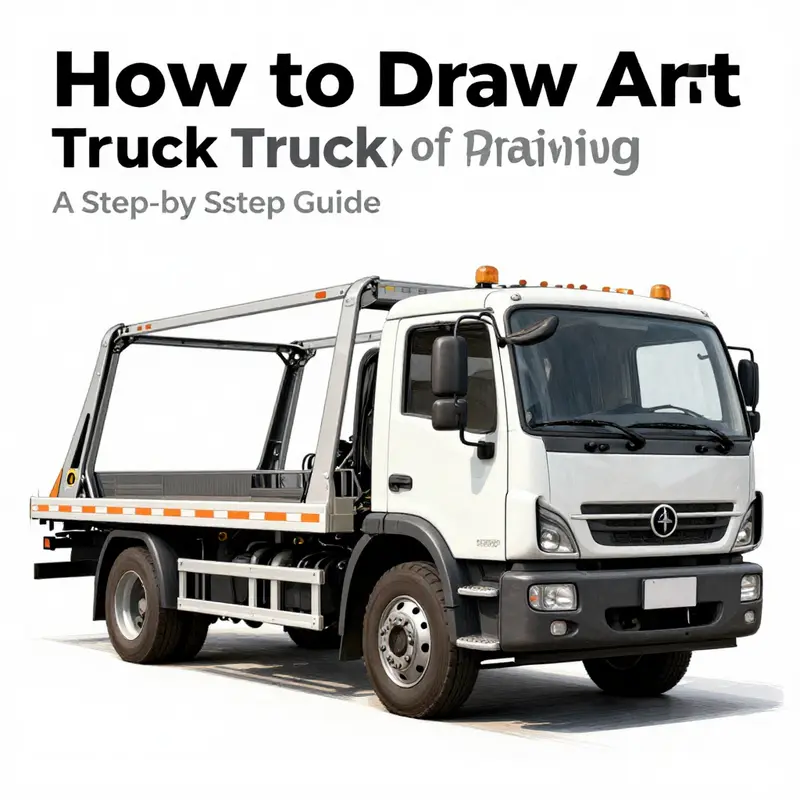
Begin with the foundation in plain sight. Draw a cab as a blocky rectangle—tall enough to suggest a driver’s eye view, but not so tall that it crowds the page. Adjacent to the cab, sketch a longer, slightly wider rectangle to represent the chassis. The goal is a clear, proportionate pairing where the cab sits comfortably on top of the frame, like a rider atop a sturdy horse. Align the two shapes so their vertical edges line up in a way that hints at structural harmony. This is more than a stylistic choice; it ensures later details—windows, doors, and the towing apparatus—sit in believable relation to the body length and wheelbase. As you set these blocks, think in terms of planes rather than lines. A slight tilt or a small bevel on the front of the cab can add the sensation of a real, three-dimensional object rather than a flat shape on the page.
With the foundation in place, bring in perspective to impart depth. One-point perspective works well for a tow truck drawing because it mirrors how the vehicle recedes toward a distant horizon line. Draw a horizon line near the middle or slightly lower on the page, then place a vanishing point off-center. The edges of your cab and chassis should subtly converge toward this point. This technique guides the placement of the roofline, the windshield angle, and the tapering of the frame toward the rear. Perspective is the quiet engine of realism here; it does not demand complex angles, but it does require consistency. If the cab windshield is drawn with a slight slant toward the vanishing point, the entire vehicle regains a believable sense of space. The wheels are your next critical touchstones. They must feel heavy and substantial, not decorative. Sketch circular outlines for the tires and align them with the axles beneath the chassis. The tires should appear larger than those on a standard pickup, with a robust arc that communicates toughness. Within each tire, add a few concentric circles to evoke hubcaps or wheel rims, and consider faint tread lines or grooves that hint at rubber’s texture. The wheel wells deserve careful treatment as recessed pockets that cradle the tires. They can be rounded or squared, depending on the truck’s style, but their edges should sit just beneath the chassis so the wheels appear to sit in place, not float.
As the wheels anchor the composition, turn attention to the chassis—the frame rails and cross-members that literally carry the weight. Draw two parallel rails running along the underside of the truck, connected by cross-members at intervals. These lines are not mere ornament; they suggest the rigid spine of the vehicle, able to bear the stresses of towing and maneuvering on uneven roads. Include brackets and small detailing along the rails to imply functional components such as mounting points for the towing mechanism and hydraulic lines. If you wish to emphasize authenticity further, sketch the suspension system with hints of springs and shock absorbers visible between the rails and the wheel assemblies. These elements need not be photographed in exact detail to read as credible; a few strategic lines can convey the idea of mobility and resilience.
The towing mechanism rises as a dynamic focal point, a counterpoint to the static strength of the chassis. Draw a sturdy, horizontal bar extending from the front portion of the frame. This bar should feel solid enough to withstand tension, with a couple of joints or brackets suggesting points of articulation. At the end of the bar, place a hook or a cable system. A simple pulley or winch drum near the back of the cab can communicate how the cable retracts and locks into place, adding a sense of movement even in still life. If you choose to illustrate a boom arm or a flatbed, render the arm with angular lines that imply rigid metal and precision. The geometry here is purposeful: the tow mechanism should look like it’s built to work, not merely to look dramatic. Subtle shading along the bar and around the joints will reinforce the perception of weight and metallic texture. Remember to consider the relationship between the towing apparatus and the cab; the mechanism should not overwhelm the cab’s silhouette but rather balance it, creating a natural flow from driver to recovery hardware.
As you layer in the finishes, the chassis comes alive with small but telling details. The frame rails beneath the truck are not just straight lines; they carry cross-members and brackets that suggest a lattice of support. Add bolts or rivets along the chassis edges to imply assembly and durability. Side mirrors, headlights, and a front grille should be added to give the cab character without stealing focus from the heavy-duty heart of the vehicle—the frame and towing gear. A license plate on the bumper, door handles along the cabin, and a few badges or decals can provide a touch of realism with minimal intrusion into the overall design. Consider exhaust pipes peeking from the rear or side as a nod to practicality and realism. If you want a hint of motion, you can add light reflections on the metal surfaces, with soft highlights on the top planes and darker shading in the wheel wells and undercarriage. The balance of light and shadow is crucial; it suggests not only form but the environment in which a tow truck often operates—lonely roads, dimly lit yards, and the reflective sheen of wet pavement after rain.
Refining the structure without overcomplicating it is a delicate act. Use a pencil to tighten lines, smooth out curves, and remove any extraneous marks. You can begin to ink the essential contours with a fine-tipped pen or marker, preserving the boldness of critical edges while allowing interior lines to recede. In this phase, the purpose is not to chase every bolt but to read the machine’s logic at a glance: where the frame stops, where the wheels begin, where the tow line travels, and how the cab and chassis communicate as a single unit. If you look at real-world references, you’ll notice the same relationships—the way cross-members align with wheels, the way the winch connects to the frame, and the way a cab’s silhouette suggests height and propulsion. Use these cues to guide your line weight and shading choices; heavier lines can emphasize the structural heft of the rails, while lighter lines can delineate panels and door handles without competing with the more dominant elements.
References are your quiet allies in this process. When you study real tow trucks, you gain a sharper eye for proportions and the way components fit together. A careful look at images or schematics helps translate what you see into what you draw. If you’re seeking a deeper, technical perspective on chassis layouts and wheel configurations, the National Institute for Automotive Service Excellence (ASE) offers diagrams and explanations that can sharpen your understanding of commercial vehicle design. This external resource complements the practice of drawing by grounding your depiction in plausible engineering relationships, from cross-members to suspension placements. See ASE for reliable diagrams that illuminate the mechanics behind the scenes. https://www.ase.com
Throughout this studio process, the goal is to capture the essence of a tow truck’s working reality—the way the chassis supports a heavy front end, the way the wheels anchor it to the ground, and the way the towing apparatus conveys purpose. If you want to share your progress or get additional pointers, you can turn to the broader practice community at the Island Tow Truck blog. The page offers practical steps, tips, and examples that echo the decision points you face while sketching wheels and the chassis, from proportion to perspective to the careful rendering of metal textures. Visit the internal resource at theislandtowtruck.com/blog to explore further guidance and examples that align with the approach described here.
As you move from sketch to finished line work, keep in mind that shading is not merely about dark areas. It is how you imply surface quality—the matte texture of painted metal, the gleam of chrome under a streetlight, and the subtle reflections that hint at a rain-slicked street. Shade in the wheel wells with a slightly darker tone than the outer body to create depth, then let the top planes of the cab receive lighter highlights. The towing bar benefits from a midtone with sharper edges where it meets the chassis to emphasize its solidity. The goal is a cohesive reading of mass: the cab, the frame, and the towing mechanism must feel like they belong to the same machine, each part reinforcing the others. By keeping the shapes clean, aligning them with a consistent vanishing point, and peppering the design with purposeful details, you create a drawing that not only resembles a tow truck but also communicates its lived-in functionality.
In practice, you’ll find that your hands fall into a rhythm: block, align, refine, and shade. The rhythm mirrors the real work of a tow truck operator, who relies on sturdy geometry and robust metalwork to perform demanding tasks. The wheel wells and frame rails provide the skeleton; the towing mechanism and cab add the personality; the finishes bring the scene to life. With patience, your tow truck drawing will carry a sense of weight and reliability that invites the viewer to imagine the clang of metal, the hum of a winch, and the quiet confidence of a machine built to pull back vehicles from the edge of danger. This is the essence of rendering a tow truck—focusing on the wheels and the chassis as the backbone of your composition, then breathing realism into every line that follows. For further technical grounding, you can reference industry diagrams and guidelines from ASE, and for broader practical insight, explore related posts on the Island Tow Truck blog as you continue to develop your drafting vocabulary and style.
Tow Lines and Tension: Refining a Tow Truck’s Structure and Details into Realistic Form
Sketching a tow truck begins with a clear faith in the basics. The goal is to translate a heavy, functional machine from life into line and shade, preserving the sense of weight, purpose, and engineering that makes a tow truck unmistakable. Start with the core silhouette: a chassis that feels robust enough to bear a front end extension and a cab perched above it, giving the vehicle a grounded stance. The cab is a practical rectangle that sits atop the longer base, slightly taller than it is wide, with a windshield that tilts forward at a subtle angle. This initial arrangement provides the foundation; it is the spine of the entire drawing.
From the front of the cab extends the frame into the work area, a long, sturdy backbone that will support the towing mechanism. In many real designs the boom is integrated with this frame, so let your instinct lead you to a single continuous line that communicates both support and reach. The first step is less about ornament and more about proportion. Get the proportions right, and everything else can fall into place around them.
As the structure grows, shift attention to the towing mechanism—the heart of the tow truck’s distinctive silhouette. The boom is not merely an add on; it is an engineered extension that gives the truck its dramatic, mechanical purpose. Draw a long, heavy bar that projects from the front or the side of the chassis, depending on the style you’re aiming for. Keep the line weight consistent with the rest of the drawing so the boom reads as an integral member of the machine, not a decorative afterthought. At the end of the boom, add a hook or a cable system. A pulley or winch drum near the cab can visually convey how the cable winds and tightens, hinting at the mechanism beneath. The idea is to capture the perception of movement even when the truck is at rest: a subtle suggestion that the machine is ready to lift, winch, or tow.
The final phase is not merely about finishing lines, but about telling a story through perspective and context. Perspective can emphasize the truck’s scale and the complexity of its components. A slight angle, where the front of the cab is a touch larger than the rear, can accentuate the sense of arrival or readiness to move. The towing operation itself can be pictured by including a second vehicle in a tow-ready position—perhaps a damaged car in the frame’s reach or a roadside scene that hints at the truck’s function in real life. Such contextual elements add narrative weight and invite the viewer to imagine the moment the tow truck springs into action. When you’re confident in the structure, return with a fine pen to solidify the essential lines, then erase stray pencil marks for a clean finish. A light layer of shading across metal surfaces can convey the cold, hard feel of steel, while softer shading around the cab can keep it from appearing too stark. The goal is clarity and realism without sacrificing the drawing’s sense of motion and purpose.
Finishing a Tow Truck Drawing: Precision in Steel and Shadow
The final stage of a tow truck drawing is where tentative lines become a believable machine. It is not about adding new shapes so much as clarifying the ones you already sketched. Start by tracing the major contours—the cab, the chassis, the tow arm—with deliberate, confident strokes. Use a medium that allows you to read your marks: a dark pencil or fineliner helps keep the finalized lines distinct from the preliminary underdrawing. Work in layers: first the broad silhouette, then the inner details like the grille, headlights, door handles, and mirrors. Vary line weight to suggest material and depth: heavier edges on the outer silhouette and lighter lines for glass and small components. Check proportions by comparing distances on opposite sides and ensuring the cab doors align with the chassis as you refine. Cast shadows under the vehicle, along wheel wells, and where the tow arm overlaps with the frame to anchor the drawing to the ground. Decide on a light source early and keep it consistent so highlights and shadows read correctly on metal, rubber, and glass. Practice careful shading with hatching and cross-hatching, mapping planes first with lighter tones and then deepening shadows where the body meets the road. When you’re satisfied, add a few highlights to suggest chrome and polished metal without overpowering the line work. If color is in the plan, choose a restrained palette that supports the drawing rather than obscures it, and apply color in thin layers to preserve the crisp outlines. The goal is a readable, capable vehicle that feels sturdy and ready for work.
Final thoughts
Creating a compelling drawing of a tow truck can uniquely benefit your business or personal projects. By following the outlined steps, you’ve equipped yourself with the skills to represent a vital vehicle that plays a crucial role in vehicle recovery and roadside assistance. Beyond just artistic expression, these drawings can serve as powerful tools—be it for marketing purposes, fleet representation, or simply to develop your artistic talents. Remember that practice is key; with time, your sketches will not only improve in quality but will also capture the essence of the robust and dependable nature of tow trucks.